How to make cake pops
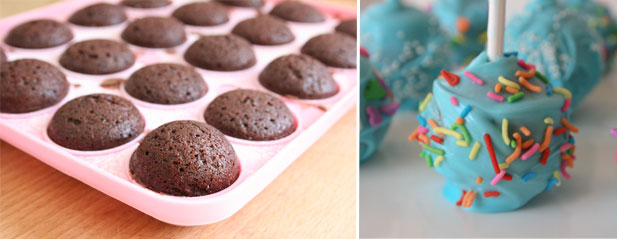
The mould is easy to use. It makes 20 pops at a time, which is handy if you’re making cake pops for the masses. All you have to do is fill the bottom half with dough, secure the top half, and bake! The key lies in greasing the holes thoroughly, and also securing the top so that the cake balls hold their shape.

Without further ado, here’s my step-by-step guide to using the cake pop mould. I used a chocolate sponge recipe but you can use any sponge cake recipe you like. To coat the pops I used candy melts, only because I wasn’t in the mood to temper chocolate. If you’d prefer to use tempered chocolate, brief yourself on the science behind it here.
Ingredients (makes approximately 40 pops)
2 eggs
3/4 cup (190 ml) sugar
1/4 cup (60 ml) sunflower oil
1/4 cup (60 ml) warm water
1 cup (250 ml) cake flour
30g cocoa powder
1 tsp (5 ml) baking powder
1/2 tsp bicarbonate of soda
Pinch of salt
40 cake pop sticks
1 packet Candy Melts, or chocolate
Decorations of your choice
Method
1. Preheat the oven to 180°C.
2. Grease and flour both halves of the cake pop mould. If you don’t do this, the cake pops will stick to the mould.
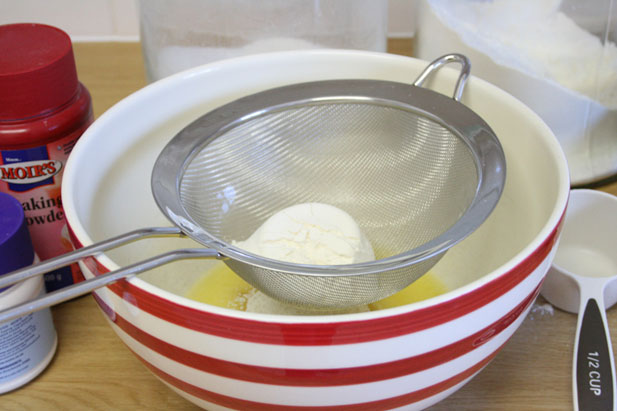
3. In a large bowl, whisk together the eggs, sugar, sunflower oil and water until thoroughly combined.
4. Sift together the flour, cocoa, baking powder, bicarbonate of soda and salt and add them to the egg mixture. Mix until combined.
5. Place the bottom half of the mould (the one without the holes) onto a baking tray. With a 1/2 Tbsp measure, scoop the batter into the holes so they’re about 3/4 full.
6. Secure the top and bake for about 15 minutes on the baking tray. The tiny holes at the top will let the steam out while baking.

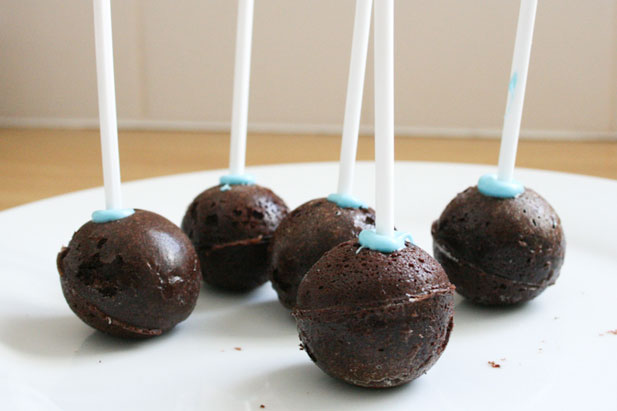
7. When the pops are done, leave them to cool in the silicone mould before removing them. I put mine in the freezer for about half an hour, as this makes them easier to coat.

8. Melt your Candy Melts or temper your chocolate. Dip one end of the cake pop sticks into the Candy Melts and insert them into the cake pops. Allow them to set in the fridge for 5 minutes.
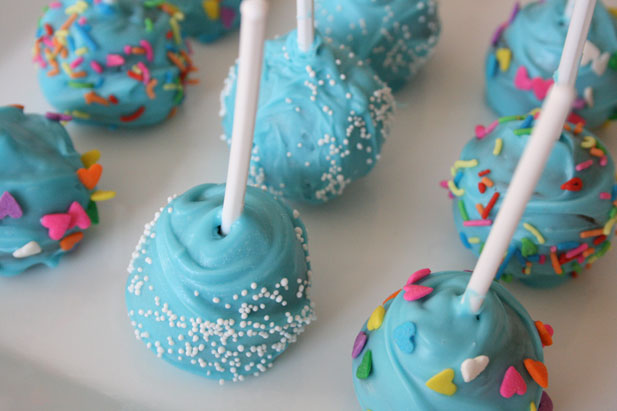
9. When the sticks have been secured, you can dip the cake pops in the Candy Melts to coat them and then sprinkle with decorations. Mine dried upside down on a platter but you can also stick the pops in polystyrene to dry upright.
It’s never been this easy to make cake pops. Why not give the mould a go?
Check out the Kitchen Craft Sweetly Does It Silicone Cake Pop Pan on Yuppiechef and their exciting selection of Wilton Candy Melts.
We love hearing your feedback and received several comments on the original cake pop recipe so we headed back into the kitchen to make sure the recipe was as easy as to use as possible. The above recipe is the revised edition.